
He drinks a whisky drink, he drinks a vodka drink…
So after all the trails and tribulations in recent weeks I finally got around to progressing on my UV light bed and started on some testing, with mixed results at best… I mean you wouldn’t believe how annoying it was to get a piece of board cut at Bunnings when all them near me were “out of order”.
Speaking of which, so what I needed for my UV to work effectively was some sort of inner board within the frame to help compress the layers on to the glass; this is both to help flatten the paper which curls during emulsion coats and ensures the negative is on tight on the surface to avoid any blurring. So after a bit of maths and googling different boards and measurements I was able to work out I just needed one board with one cut, then with my router table I could create a lip that the inner dimensions of the board fit perfectly into the frame.

In use the board is actually underneath with the light bed on top, but ya know it’s the photo I took… post-it note for size reference.
Now that I had my paper (as seen in the left of the above picture) and I had my UV light bed mostly set up (I have more plans to come), it was time to start testing.
My plans was to create three test pages with different densities of emulations, basically one to three coats per page. Using a scale as a negative I exposed the paper under different time lengths to gain an understanding of the exposure levels on the high, mid, and darks tones. Unfortunately it didn’t work out as expected due to a process I applied which is needlessly complicated to explain (and better suited for applications at TAFE) I didn’t like the result.
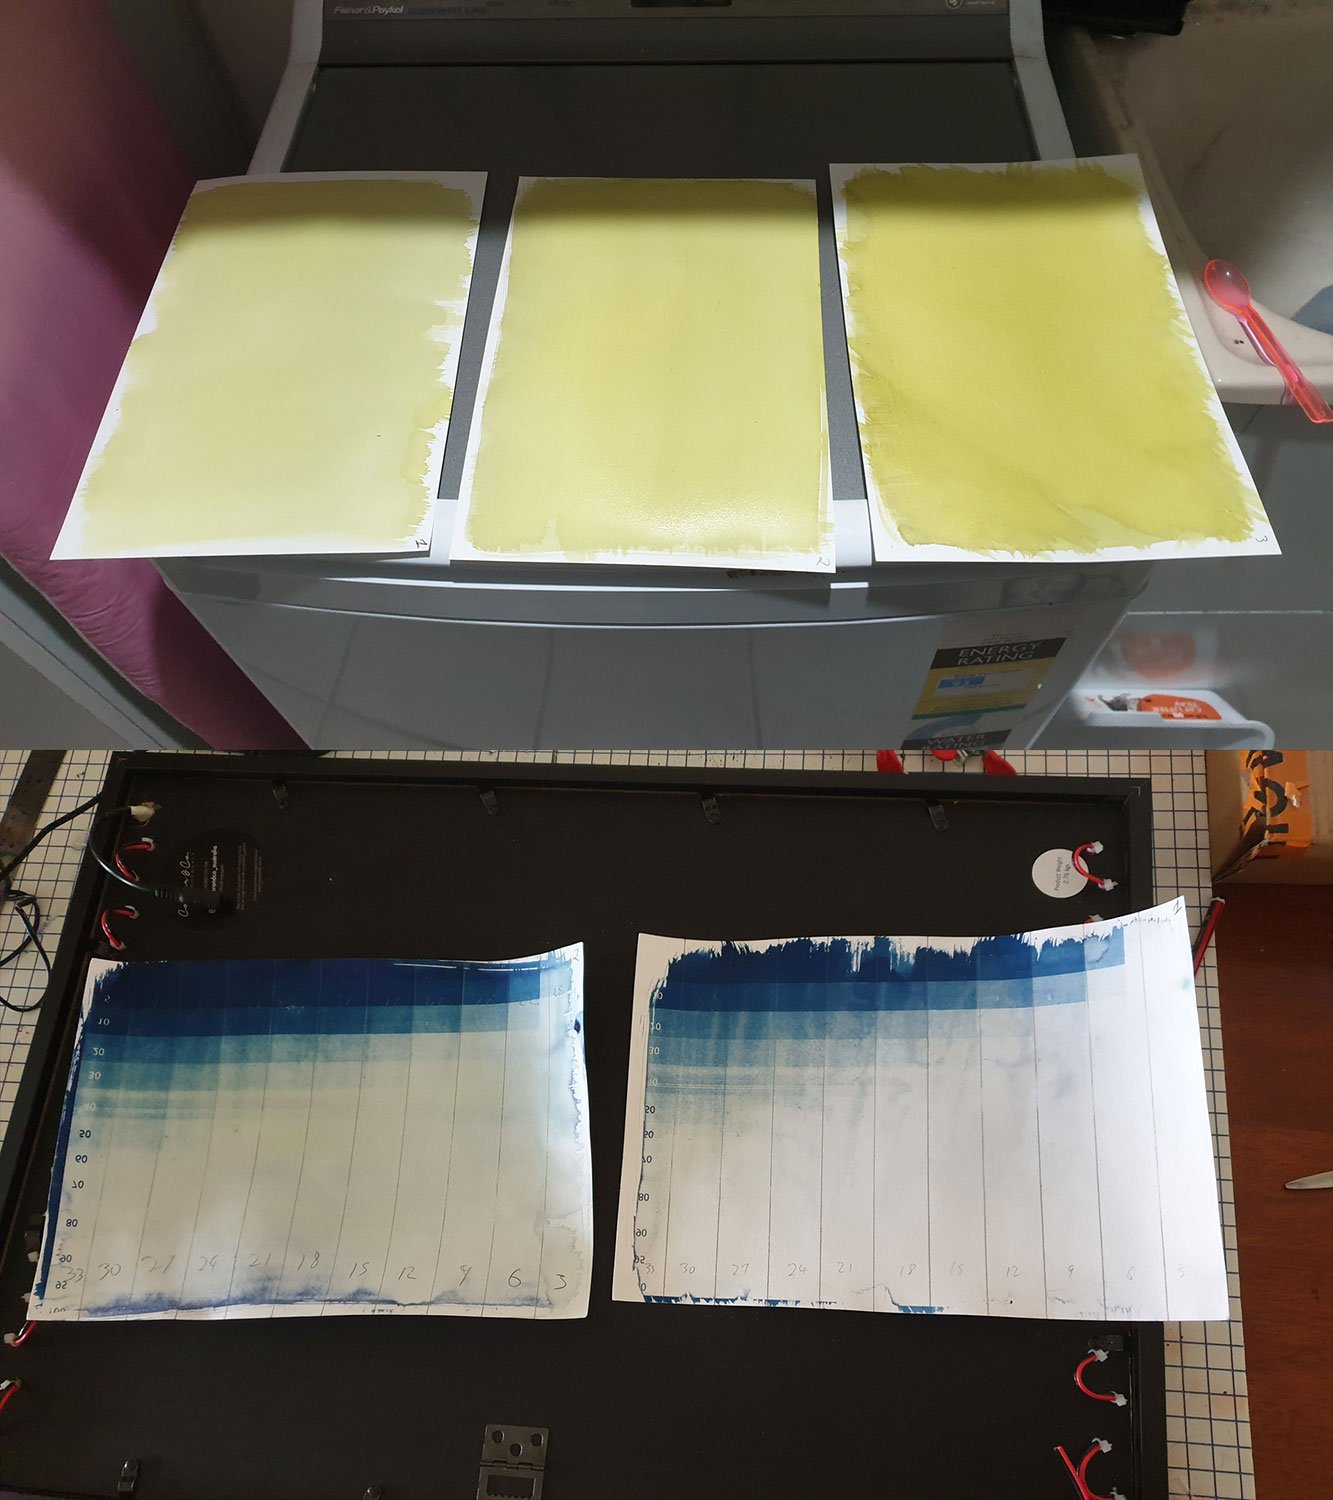
Left is two coats and right is one coat… both look identical (which is bad) and both have terrible midtones (which is worse).
The great thing about this sort of experimentation is that there are no bad results only evidence to point you in the right direction. The positive lesson to take from this is that yes the UV light bed works, it doesn’t look like there are any hot spots from the LEDs, and despite some screw ups on my end the theory works a treat.
I probably should have washed out the emulsion a little more on both but honestly there are tests and I didn’t want to spend 20 minutes with cold running water washing each one on a winters night… but that’s not the only test.
Naturally I was unsure how much emulsion I needed to make I made a little too much for the paper I had, but that was fine as I wanted to do some other tests. We had been taught to use brushes to ‘paint’ the emulsion onto the paper and my brain immediately through about how to use the brush strokes to add meaning or dimensionality to it, but of course I also considered different applications as well such as sponges, airbrushing, flicking, dabbing, etc.
I put this under the UV for twenty minutes and came out great.

Top: airbrush, brush splatter
Bottom: brush strokes, brush dabbing, brush dropping (it didn’t cover and I had to fold to put it away hence the Rorschach) and finally finger painting (with gloves)
Once I’ve got the calibration tests to a satisfactory level and decided how I want to coat my paper then a big part of it is done right? Well no, because I’ll be started to experiment with the post processes with dying and bleaching and I’m no where near there yet. I also made a dumb little meme when I realised I was wearing my shitty blue jumper when coating my emulsion.
What he said.
S